Garden Poppies – colourful and extravagant

Individually the delicate, tissue paper like flowers of the Poppy may be quite fleeting in nature but on mass they can provide a beautiful and vibrant show over many weeks. In a meadow style planting they also provide that much needed movement as they gently sway in the summer breeze.

The Poppy family (Papaveraceae) offers the gardener a range of annual, biennial and perennial species in an amazing spectrum of colours that span yellow, pink, scarlet, deep plum, orange, blue and white. Certainly not all poppies are red!

Papaver rhoeas (Common Poppy)

Despite the adoption of modern agricultural practices and the reduction of our native poppies in the countryside we do still see the occasional field full of red poppies as we drive across the Cotswolds in summer.

P1030148

Probably more common in the garden setting are Shirley poppies. These were initially bred from field poppies by the Rev. William Wilks, vicar of Shirley in Surrey in the late 1800’s. He selected a range of white edged flowers that have now been developed into a range of tones.

P1030173
Papaver rhoeas ‘Falling in Love’

Papaver rhoeas is an annual herbaceous plant usually flowering in late spring and into summer.

Papaver nudicaule (Iceland Poppy)

Another common garden plant is the Iceland Poppy. It originates from sub-arctic regions and can grow to a height of 1-2½ feet. It is the poppy most frequently grown as a cut flower and is also a charming garden plant.

P. nudicaule (nudicaule meaning bare stemmed) is a perennial that is most commonly grown from seed as an annual. Sown at 18-24º C the tiny seeds will germinate in 7-12 days. These seedlings can be pricked out into modules to grow on and then be planted out when conditions are suitable.

Interestingly Iceland Poppies do poorly when the temperature rises above 21º C. The plants flower from mid-spring to mid-summer and usually produce 10-15 stems before being checked by warmer temperatures.

Papaver nudicaule dsc00913

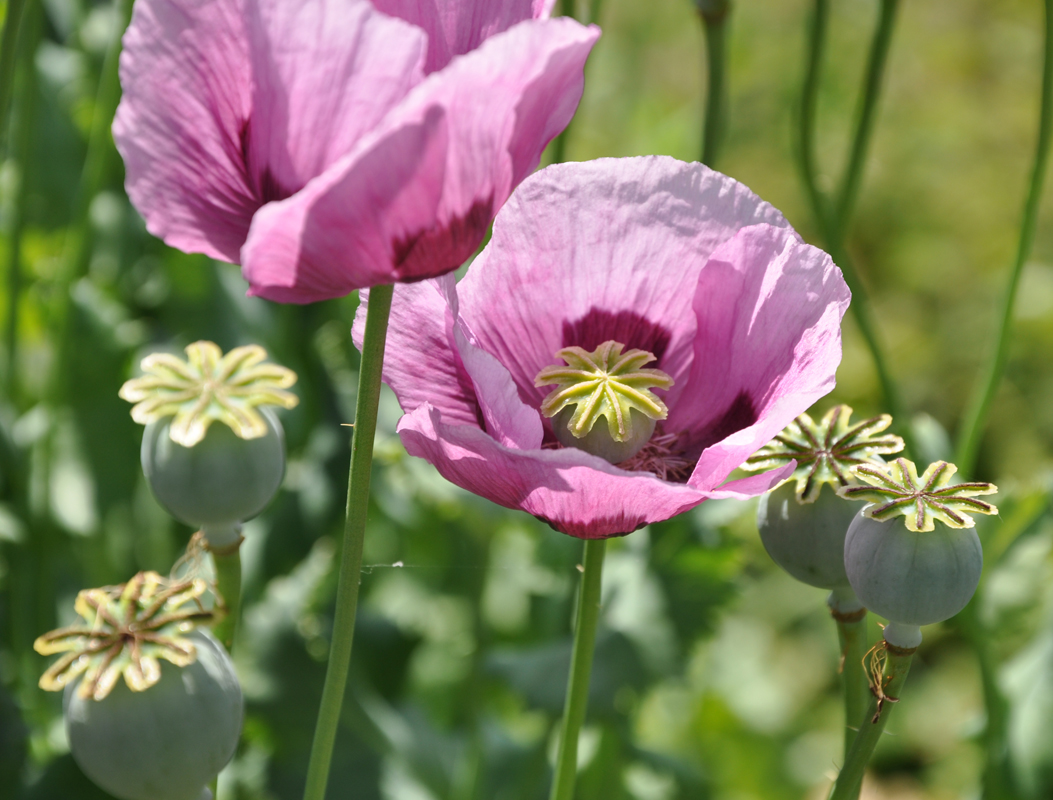
Papaver somniferum (Opium Poppy)

The Opium Poppy is an attractive, upright annual herbaceous plant that can grow to a height of around 100cm. As a garden plant they have been bred in a number of colours in both single and double forms although we have found the double forms are sometimes too heavy to stand upright on their stems. The foliage has a characteristic blue-green glaucous apprearance and they seed themselves freely around our garden.

The seed heads are particularly attractive and can be used both green and dried in flower arrangements and wedding buttonholes.

Photo credit: Ventnor Botanic Garden

Papaver orientale (Oriental Poppy)

The Oriental Poppy is a very hardy perennial poppy growing to a height of 3 feet with a spread of 2 feet. For us it is a very reliable spring flowering herbaceous plant that produces a large number of large, hand-sized flowers. The large fleshy stems and foliage will often need staking to keep them looking at their best.

They originate from the Caucasus, north eastern Turkey, and northern Iran and in the wild grow on rocky slopes and dry meadows. Originally orange these plants now have cultivars that come in a wide range of colours. We have found the white varieties are particularly prone to damage if we get a lot of rain and can look like a sad, soggy hankerchief at times.

Oriental poppies combine well with other plants in low herbaceous borders. One of my favourite parts of the garden combines these pink oriental poppies with aquilegia, ox-eye daisies, purple flag iris, lime-green alchemilla and dusky pink valerian.

It is worth mentioning that by mid-summer the foliage and flowers of P. orientale will have died down entirely and will need to be cut back. To continue the display into late summer it is important to surround these poppies with other later flowering perennials.

P1010453

Eschscholzia (Californian Poppy)

Grown well Californian poppies can produce a spectacular show of delicate, bright orange blooms complemented by equisite blue green foliage. Ever since seeing the wonderful display at East Rustan Old Vicarage in Norfolk I have been trying to grow these in our own garden – but with only limited success. Native to California, these hardy annuals grow in dunes, rocky hills and roadside banks and I can only think that our soil and conditions here in the UK Midlands are a little too damp to allow them to thrive.

East_Ruston_Old Vicarage Garden
Eschscholzia – East Ruston Old Vicarage Garden, Norfolk – June

Meconopsis betonicifolia (Himalayan Poppy)

We have found the beautiful blue Himalayan Poppy to be somewhat of a challenge to grow successfully. It is something that Carol’s grandfather, Fred Mason, grew successfully in his garden in Bolney in Sussex for years. Although we have tried on a number of occasions we have never managed to keep this perennial poppy going from year to year.

Its delicate, true blue petals are truely enchanting and a definite showpiece when you are successful however.

As the name suggests blue Meconopsis are native to the Himalaya and Western China. They grow in alpine meadows, woodlands and on screes and like cool, damp summers. Although we have cool and damp winters our summers here are increasingly hot and dry and our clay soil holds little moisture in the heat of the summer. The reference books indicate that Meconopsis need plenty of water in summer and as little as possible in winter which does not sit at all well with our conditions. However, there are plenty of other Poppies that we can grow very successfully.

Scheinmohn (Meconopsis betonicifolia) 5863

Meconopsis cambrica (Welsh Poppy)

To illustrate the point above a related Meconopsis, the yellow Welsh Poppy, grows very successfully here at Waverley. It is the only Meconopsis that is native to western europe. It is a short -lived, delicate perennial that seeds itself freely.

P1030181

Cultivation

In general poppies are easy to grow and like sun or semi-shade in moist but well drained soil. I think they look at their best if planted in generous clumps.

The annual species ( such as P. rhoeas ) do not like to be transplanted and so are best sown where they are to flower. It is important not to cover the tiny seed as they need light to germinate. As cornfield plants they are naturally colonisers of disturbed ground and the seeds can survive in a dormant state for many years before being exposed by ploughing. They will then germinate rapidly if conditions are right. This is also the reason why they are associated with battlefields where the ground was distrurbed by the bombs, grenades and troop movements.

Biennials or short lived perenial species (such as P. nudicaule) are more tolerant of being transplanted. We sow these on the surface of trays of multi-purpose compost (again not covering the seed) in an unheated greenhouse. When the plants are big enough to be pricked out we plant them up into larger modules and allow them to grow on. The modules are them transplanted out when conditions are right trying not to disturb the roots if at all possible.

The larger perennial species (such as P. orientale) are best propagated by root cuttings in the winter especially if you wish to retain the characteristics of a particular cultivar. They are unlikely to come true from seed.

Many poppies will self seed freely if the conditions are right. We have not found them to be at all invasive and if they do happen to seed themselves somewhere they are not wanted they are very easy to remove.

Cutting and conditioning

It is possible to use poppies as cut flowers but they do need to be cut at the right stage, prepared and conditioned appropriately to get the best out of them. We do not find them particularly long lasting but they do certainly add a definite country feel to any bouquet.

Poppies for the vase should be cut when the flower buds are beginning to break and the colour is just able to be seen. If they are fully open they will be difficult to condition.

The base of the stems should be seared in boiling water for 20-30 seconds before topping up the vessel with cold water. The stems should then be left to condition in a cool place, out of direct sunlight for at least 2 hours and preferably overnight. The searing process reduces the flow of the milky sap (latex) which would otherwise bleed out and clog up the xylem vessels which transport the water up to the flower.

Winter arangements

It is worth highlighting that many types of poppy produce interesting seed heads that are also excellent for autumn and winter arrangements (along with the seed heads of nigella, teasel, honesty and dried hydrangea flowers).

In our ceramics we have also found that poppy seed heads can be used to make some interesting botantical texture effects that will be picked out by using oxides or suitable glazes.

Further reading

“Specialty Cut Flowers” by Armitage and Laushman (ISBN 0-88192-579-9)

“The Cutting Garden” by Sarah Raven (ISBN 978-0-7112-3465-9)

“The Flower Farmers Year” by Georgie Newberry (ISBN 9780857842336)

“100 flowers and how they got their names” by Diana Wells (ISBN 1-56512-138-4)

“A-Z of perennials” Consulting Editor: Lizzie Boyd (ISBN 0-276-42087-X)

“A-Z of annuals, biennials and bulbs” Consulting Editor: Lizzie Boyd (ISBN 0-276-42089-6)

“Perennial Volume 2: Late Perennials” by Roger Phillips and Martyn Rix (ISBN 0 330 30936 9)

Six star plants for August

Despite the weeks of dry weather here in the UK Midlands some of the garden plants have still performed wonderfully during August.  These late summer flowers are adding a real freshness to the garden which has otherwise looked rather dry and scorched.

Here are my ‘Six on Saturday’ star performers.


One:  Agapanthus africanus

These are the large evergreen Agapanthus with strap like leaves.  They tend to be more tender than the deciduous types.  These plants are growing in large terracotta pots that we take into the greenhouse for protection over the winter months.

P1010986 Agapanthus


Two:  Sunflower ‘Vanilla Ice’

This is a medium height sunflower with delicate lemon yellow hand-sized flowers.  They do need some support but if you keep dead heading you get a succession of good quality flowers throughout the summer.  As you can see they are also enjoyed by the bees.

P1010918 Sunflower Vanilla Ice


Three: Physostegia virginiana

This is a perennial that thrives in damp soil and full sun.  Part of the cut flower garden is waterlogged for most of the winter and also remains moist through the summer months.  The Physostegia (along with the Astilbe) love these conditions.

P1020012 Pysostegia


Four:  Cosmos ‘Sensation Mixed’

One of my favourites.  It is such a happy looking plant and the large colourful flowers complement the green fluffy foliage wonderfully.  Over the years we have learnt not to treat it too kindly.  If you plant it in ground that has not been previously cultivated you get masses of green leaves and very few flowers until very late in the year.  Not terribly helpful for cutting.  Growing in poorer ground with little additional fertiliser gives you many more flowers earlier in the year.

P1010889 Cosmos


Five:  Rudbeckia

It has been difficult to choose just one Rudbeckia.  They are so important to the late summer garden yielding masses of bold yellow and rust coloured flowers.  This particular variety is an annual Rudbeckia hirta ‘Autumn Forest’.

P1010997 Rudbeckia


Six:  Acidanthera

Last but certainly not least in this six is the Abyssinian gladiolus, Acidanthera murielae.   Unlike many of the garden gladioli it looks delicate and elegant and moves gently in the breeze.  It has a wonderful scent and is good for cutting.

P1020016 Acidanthera


The Six on Saturday meme is hosted by The Propagator. Click on the link to see what other plant lovers are chatting about.

Zinnia elegans – a hot climate plant from Mexico loving the 2018 UK heatwave

One flowering annual that has thoroughly enjoyed the hot weather this year has been the Zinna.  Whereas the Dahlias appear to have been delayed this year the Zinnias have produced tall, strong, clean plants with masses of excellent quality flowers.

Zinnia Lilliput Purple P1010994
Zinnia elegans ‘Lilliput Purple’

I must admit that in previous years my Zinnas have struggled and if you get a cool period they just seem to sulk.  In order to try and improve their chances in the future, even in cooler years, here are a few things to consider.

  • Grown from seed Zinnia will germinate in 3-5 days at 27-29°C and 5-7 days at 21-24°C.¹
  • The seedlings should be grown on with night time temperatures of 15-18°C and day time temperatures of 21°C.¹
  • Zinnas dislike root disturbance so ideally the seeds should be sown in individual modules to reduce disturbance at the planting out stage.
  • Plant out at a spacing of around 6 inches apart.  The denser the spacing the taller the plants.¹
  • Zinnas are quantitative short day plants (see How plants use day length to decide when to flower (Photoperiodism) ).  This means that they flower more rapidly under short days but eventually flower regardless of photoperiod.   Long days (greater than 12 hours) produce longer stems but delay flowering.  Similarly if you plant a succession of Zinnas after the longest day they will flower on shorter stems.¹
  • Benzakein⁴ emphasises the importance of pinching out the central flower bud when the plants are 18 inches tall to encourage the development of lower branches on the plant.
  • Zinnas do seem to be prone to powdery mildew particularly if growing in conditions where hot days are followed by cool damp nights.  Over watering can cause similar problems.
  • If you are growing for cutting, pick the flowers before the pollen matures.  If you can see fluffy, mature pollen the chances are the bees have done their job and the flower is now redundant and will wither to allow the seed to develop.
  • There seems to be a difference in view as to whether Zinnas like ‘flower food’ or not.  Beutler² states very clearly that they do not like floral preservative whilst Benzakein⁴ is an advocate of its use with Zinnas.
  •  Zinnas are long lasting in water but will wilt rapidly out of water and it is reported that they do not work well in corsages and buttonholes.²

In reality there is little that many of us can do about the great British weather and in some years different species will grow better than others.  Certainly Zinnas like it hot and starting to grow the seeds too early if you don’t have the facilities to keep them warm can reduce your chances of success.

Benary's Giant Wine
Zinna elegans ‘Benary’s Giant Wine’

Keep in mind that Zinnia elegans is a warm-hot climate plant native to Mexico growing in scrub and dry grassland.  Not every year will be suitable for them here in the UK but their bright vivid colours in late summer are certainly striking when conditions are right.

Half Hardy Annual

Origin:  Mexico

Height:  60-90cm

Flowering period:  July to October

Latin name:  Zinnia elegans (after botanist Johann Gottfried Zinn (1727-1759)) ¹

Family:  Asteraceae   (Tribe:  Heliantheae – Sunflowers)

Further reading

¹  “Specialty Cut Flowers” by Armitage and Laushman (ISBN:  0-88192-579-9)

²  “Garden to Vase” by Linda Beutler (ISBN: 978-0-88192-825-9)

³  “The Cutting Garden” by Sarah Raven (ISBN: 978-0-7112-3465-9)

⁴  “Cut Flower Garden” by Erin Benzakein and Julie Chai (ISBN: 978-1-4521-4576-1)

The new rose garden begins to flower – very exciting!

When we started this blog last September we described our dreams and plans to create a beautiful new flower garden.  Our intention was to move away from a cut garden focused purely on growing cut flowers for sale in regimented straight beds to a more aesthetically pleasing space, still a cutting garden but somewhere that you want to stop, sit and enjoy.

During the winter we spent many hours preparing the ground and setting out the new layout, planting the new formal hedging and building the new rose arches.  In March we started to plant out all the new roses we had spent many happy hours choosing from the catalogues.

Despite all the challenges with the weather during the long cold, wet winter and now the heat and drought of mid-summer, the new roses are developing wonderfully.  Behind the new short clipped hedge we have planted a selection of pink and white roses ranging from deep dusky pink through mid-pink to pure white.  All have been chosen for their scent, repeat flowering and suitability for cutting.

All four varieties have been flowering for some weeks now and with regular dead heading are continuing to repeat flower.  The foliage seems to be disease free so far.

Here are the four varieties we have planted in this area:

Rose "Sweet Parfum de Provence"
Rose “Sweet Parfum de Provence”
Rose "Prince Jardinier"
Rose “Prince Jardinier”
Rose "A Whiter Shade of Pale"
Rose “A Whiter Shade of Pale”
Rose "White Perfumella"
Rose “White Perfumella”

We have written previously about our plans for enhancing the garden in the evenings with white blooms that shine out in the dusk and with scent that hangs in the air ( Zaluzianskya – Twilight Scent ).  These light coloured blooms have been introduced as part of these plans with the aim of illuminating the walk around the garden at dusk.


Honey Pot Flowers are wedding and celebration florists based in Warwickshire in the United Kingdom specialising in natural, locally grown seasonal flowers. We grow many of our own flowers allowing us to offer something very different and uniquely personal.


The blues of July – Six on Saturday

The wedding season is in full swing and blue seems to be the colour of the moment.  As we bask in the summer sun here are this weeks ‘Six on Saturday’ from the garden.  All seem to be loving the hot weather.

One:  Lavender

P1010774

Two:  Echinops ritro

P1010782

Three:  Ageratum (with Clary Sage in the background)

P1010783

Four:  Eryngium planum

P1010788

Five:  Cornflowers

P1010785

Six:  Sweet Peas

P1010789


The Six on Saturday meme is hosted by The Propagator. Click on the link to see what other plant lovers are chatting about.


Honey Pot Flowers are wedding and celebration florists based in Warwickshire in the United Kingdom specialising in natural, locally grown seasonal flowers. We grow many of our own flowers allowing us to offer something very different and uniquely personal.

Clematis in all its glory

Rather like old friends our clematis return each year and delight us. They have increased in number and size over the years and these long-lived plants quietly creep around the trees and shrubs and emerge reliably each year. We love collecting new varieties and luckily many have enjoyed the conditions in our garden.

It is a pure joy to suddenly come across that first bloom of the year from a clematis that has been quietly surviving over the winter. The large buds develop and then, there it is, the first perfect flower.

'Niobe' climbing amongst a white Philadephus
‘Niobe’ climbing amongst a white Philadephus

For other smaller flower varieties like C. montana it is the spectacular show provided by a large cloak of thousands of flowers in delicate pink that sit wonderfully amongst the white lilac tree and our purple leaved Prunus padus. You don’t seem to notice how far it has spread until it blooms. There is a danger that a strong clematis might well overwhelm a smaller tree but there is no doubt the effect is dramatic.

Clematis montana climbing amongst the red foliage of Prunus padus

Distribution in nature

Britain has only one native species of clematis (C. vitalba (Old Man’s Beard)) but there are over 250 species¹ distributed mainly in tropical or temperate regions. Most are natives of the northern hemisphere with several native to Europe. As well as the very familiar large flowered hybrids that grace the garden centres there are a number of smaller flowered species that make highly desirable garden plants.

Clematis alpina - one of the earliest clematis in the garden flowering here in in April
Clematis alpina – one of the earliest clematis in the garden flowering here in in April

A member of the Ranunculaceae (the buttercup family), clematis come in a wide range of blue mauves to purples but also white through pink to shades of red, burgundy and also yellow. The petals of Clematis have been replaced by colourful sepals. Typically these are in fours or eight but some (eg. Clematis ‘Niobe’) have six. Through a careful choice of cultivars and species you can have clematis flowering in your garden from spring through to autumn.

Clematis are not commonly grown for their scent but we would not be without our C. x aromatica which climbs over our rope rose arches and provides a lovely waft of ‘vanilla’ scent across the garden in the evening. A strategically placed seat and a glass of wine are all you need to enjoy the experience to the full.

Clematis 'Daniel Daronda'
Clematis ‘Daniel Daronda’

Clematis in the garden

One of the essential benefits of clematis is that they exploit the vertical dimension of the garden. They climb over their hosts by using their leaf stems. Given an appropriate support, they can rapidly cover a trellis or other structural feature. Variety ‘Nelly Moser’ with its large pink flowers is also very comfortable growing against a north facing wall.

Clematis 'Nelly Moser'
Clematis ‘Nelly Moser’

Most of the clematis we have growing here at Waverley are deciduous however there is one, C. armandii, which is evergreen. This is a tough old plant and wants to survive. Its supporting tree was felled over ten years ago but even after a ruthless prune it still flowers every year and clambers through the remaining lower shrubs.

Evergreen Clematis armandii

The most successful of our clematis are growing amongst other mature trees or shrubs and they climb their way up to the light. They don’t seem to mind the competition and many books indicate that the roots need to be kept shaded and cool. Where we have clematis growing up supports in more formal flower beds we make sure they are planted amongst herbaceous perennials to ensure that the root area and base of the plant is kept in the shade during the summer months.

The general advice is to plant pot grown clematis deep² so that if the plant is damaged or contracts wilt it will regrow new shoots again from under the surface. When preparing the planting hole for a new clematis you should include plenty of organic matter.

Clematis montana 'Tetrarose'
Clematis montana ‘Tetrarose’

There is a lot written about pruning clematis. For us the simple and easy to remember phrase “if it flowers before June do not prune” works well for us.

Cutting and conditioning

Clematis can make a wonderful addition to any floral design. Its trailing habit adds something not offered by many flowering plants suitable for cutting. Growing a stem that trails effectively does require some forward thinking otherwise you end up with a tangled mess to unravel. Some of our clematis grow across a rope arch and individual strands are allowed (encouraged) to hang down naturally in preparation for cutting.

As with most flowers they are best cut in the cool of the early morning and placed into cool water to condition for at least 24 hours. To get the best vase life cut into older wood.

The stems last well and can be effectively added to long table arrangements to trail down the front of a top table. We probably use the smaller C. montana more often for this kind of arrangement.

Trails of clematis montana
Arrangement with trails of clematis montana and asparagus fern

There is no doubt that Clematis add something very special and different to the garden. Many look delicate but they are really very tough and resilient plants if you give them conditions that they can thrive in. Choosing your varieties carefully can provide on-going interest throughout late spring and summer and into autumn.

Clematis 'Jersey Cream' creeping amongst a trellis of dark ivy leaves.
Clematis ‘Jersey Cream’ creeping amongst a trellis of dark ivy leaves.

Further reading

¹ “A comprehensive guide to Clematis” by Barry Fretwell (ISBN 0 00 414017 6)

² “Growing Clematis” by Nicholas Hall, Jane Newdick and Neil Sutherland (ISBN 1-85833-163-3)

Dahlia – signifying dignity and elegance dahlias make striking garden plants and excellent cut flowers

The Dahlia flower represents dignity, elegance and a commitment and bond that will last forever.  They are therefore ideal cut flowers for celebrating love and marriage and we use them extensively in our wedding and celebration flowers (www.honeypotflowers.co.uk).

At this time of year (March) we begin to dust off the overwintered dahlia tubers and start them into growth.  As they flower from June until the first frost blackens the leaves, the once unfashionable Dahlia creates a wonderful summer and early autumn show throughout the flower garden.

The choice of colours is unrivalled and ranges from white, red, pink and purple through to yellow and orange with many shades in between.  Equally there is a huge range of sizes and forms ranging from less than 10cms in diameter to the huge and rather unwieldy ‘dinner-plate’ varieties at over 25cms.  Breeding programmes have created many forms which now include singles, waterlily, collerette, anenome, pompon, ball, semi-cactus, cactus, decorative, orchid, and peony flower types to name but a few.  There is probably a style, size and shade to meet just about every colour theme and requirement.

Late summer bridal bouquet of country flowers featuring white and lilac dahlias with yellow, lilac and blue set off with pops of yellow and fresh green. Flowers by Honey Pot Flowers
Late summer bridal bouquet of country flowers featuring white and lilac dahlias complemented by yellow, blue, pink and fresh green. Flowers by Honey Pot Flowers

Origin

Dahlias are tuberous perennials originating from the uplands and mountains of Mexico and central america.  The edible tubers were reportedly grown as a food crop by the Aztecs.  As they are mostly unscented they attract pollinating insects through their bright colourful flowers.

Starting Dahlias in the spring

There is no doubt that growing high quality Dahlias takes some time and effort, particularly if you want to maintain and develop your investment in plants over a number of years.  At this time of year we bring out the dahlias that we lifted last autumn and overwintered in our flower studio.  Although some will perish we find that the majority will survive if the tubers are cleaned and air dried and then individually wrapped in newspaper in covered trays and boxes.  Because we have got rather carried away over the years we now have so many tubers we just don’t have the room to lift and store every plant.  We therefore allow some to take their chance in the garden covering them with straw and cloche plastic over winter.  (We have written about how we do this in a previous article)

In March we check over the lifted tubers for any rot.  If the damage is not too great it is often possible to remove one or two diseased tubers from a larger clump and they will still grow well.

The tubers are planted into individual large pots or crates in moist compost before bringing into a warm (15-18 °C) and light place indoors to encourage them to shoot.  It is important to pinch out the tips of shoots once they begin to get going.  This will help the plants to bush up and make a better shaped plant as well as reducing the risk of damage when you come to move the plants into the garden.

Large white waterlily type dahlias are central to this colourful entrance garland at Swallows Nest Barn near Warwick. Flowers by Honey Pot Flowers

Propagation by division

There seems to be a difference of opinion on when to divide tubers if you want to split large clumps to create more plants.  The RHS indicate that this should be done in the spring whilst others (eg. Floret Farm) advise that it is best done after lifting in the autumn.  The important things to remember is that each portion must have a flower shoot and roots if it is to grow on and develop successfully.

This year, purely for practical reasons, we divided in the autumn.  The clumps had got so large that they were difficult to effectively lift, clean and dry off before we set them down for the winter.

Taking cuttings

It is possible to take cuttings from your overwintered dahlias once the tubers have sprouted and the shoots are ≥2 inches long.  This is again an excellent way of multiplying up your favourite varieties.  We place the cuttings in small 3 inch pots of a free draining mix of multi-purpose compost and perlite (3 to 4 cuttings round the edge of each pot), water in, cover with a plastic bag and place on a warm window sill.  They will root in just a few weeks if looked after.  Once roots have formed we would then begin to remove the plastic cover slowly allowing some air into the bag for a few days before removing completely.

Soon you will have far more plants than you know what to do with and you can share with your friends!

Planting out

Dahlias can develop into large plants if they are grown well and need to be spaced at least 18 inches apart.  Ideally they like to be planted in full sun with ground that retains moisture but is also well drained.  On our wet clay soil we tend to plant on slightly raised beds to provide better drainage.  We only plant out the growing tubers when all risk of frost has passed.  However, you do sometimes get caught out and keeping some horticulture fleece at the ready to quickly throw over the plants to see them through a late cold snap is usually sufficient.

To get strong, lush plants that flower freely all year you need to water well and feed regularly.  The RHS suggests feeding with a high potash liquid feed every 2 weeks from July to early September.  I have to admit that regular feeding is not one of our strengths.  Let us just say we are now better than we used to be!

Most of our Dahlias will need to be staked and supported at some point to ensure we get good straight stems that we can use in our bouquets and arrangements.

Peachy pink dahlias are the feature bloom in these christening arrangements. Flowers by Honey Pot Flowers
Peachy pink dahlias (Jowey Winnie) are the feature bloom in these christening arrangements. Flowers by Honey Pot Flowers

Pests to beware of

One advantage of starting the tubers indoors is that the plants are big enough to cope with the onslaught of slug and snails.

For those we leave in the ground the challenge is greater.  You do really have to keep on top of them until the new shoots get away.  Tidy up any old bricks, stones and straw where slugs and snails can hide during the day.  A regular dose of biological control nematodes ( eg. Nemaslug) can also help.  We are also delighted that the flower garden is home to toads, frogs and newts and keeping some longer, moist grass areas in the flower garden seems to encourage them.

Later in the year the battle will be with earwigs which will damage the leaves and eat the flowers.  Interestingly we have found that white Dahlias seem to be particularly tasty but we don’t know the reason behind this.

Photoperiod

Armitage and Laushman report that day length has a direct influence on both flowering and tuber formation.  Long days of 14 hours cause faster flower initiation but day lengths below 11 hours and greater than 16 hours have a negative impact.  Short days (12 hours or less) result in tuber formation.

Breaking tuber dormancy

For many growers one of the reasons for lifting tubers in the autumn is to protect them from excessive cold temperatures over the winter.  It is interesting to note that cold temperatures (around zero degrees centigrade) are however important in breaking tuber dormancy (Armitage and Laushman).

A bright and colourful collection of country flowers with feature dahlias in small jars create a striking table centre piece for a rural country wedding. Flowers by Honey Pot Flowers.
A bright and colourful collection of country flowers with feature dahlias in small jars create a pretty table centre piece for a rural country wedding. Flowers by Honey Pot Flowers.

Cutting and conditioning

Dahlias can make spectacular cut flower arrangements if harvested at the correct stage and conditioned properly.

If the flowers are cut too early Dahlias buds often fail to open effectively.  Equally you want to cut the flowers before the outer back petals begin to show signs of age.  Petals will drop rapidly if the flowers are too old and so picking the flowers when they are at around 75% open is ideal.

The ideal time for cutting is in the early morning before the summer sun gets going.  It is a lovely time to be out there in the flower field with your secateurs. The flowers once cut should immediately be placed into deep warm water and left to condition for a couple of hours.  We use ‘flower food’ to increase vase life and some growers (see Linda Beutler) also advocate hot water treatment prior to placing in cool water.

We have noted that some varieties are more suitable for picking than others.  For some varieties the flower will ‘shatter’ as you reach forward to cut them! We have found variety ‘Wizard of Oz’ particularly prone to this.  Good for petal confetti however!

Bridal bouquet in burgundy, blue and white topped with a striking pheasant feather. Flowers by Honey Pot Flowers. Photograph by Amy Bennett Photography
Autumnal wedding bouquets using deep burgundy dahlias (Karma Choc and Dark Spirit) contrasting with shades of blue flowers and glaucus foliage. Flowers by Honey Pot Flowers. Photograph by Amy Bennett Photography

Treated well, Dahlias will give you months of pleasure throughout the summer and into the autumn months.  The more you cut the more they will flower and it is important to keep on top of the dead heading to keep them flowering freely.

As the season progresses will will share some further pictures of the star blooms of the summer.  Early spring is such an exciting time of year planning for warm summer days to come!

Further Reading

“Cut Flower Garden” by Floret Farms (ISBN 978-1-4521-4576-1)

“Specialty cut flowers” by Armitage and Lushman (ISBN 0-88192-579-9)

“Garden to vase” by Linda Beutler (ISBN 978-0-88192-825-9)


Honey Pot Flowers are wedding and celebration florists based in Warwickshire in the United Kingdom specialising in natural, locally grown seasonal flowers. We grow many of our own flowers allowing us to offer something very different and uniquely personal.


Helleborus orientalis (Lenten Rose)

The fact that so few herbaceous plants are winter flowering makes the show of Helleborus orientalis around the Honey Pot Flowers garden particularly special at this time of year. With large flowers from dark aubergine through shades of pink to white, these flowers make you stop as you wander around the winter garden turning over the downward facing flowers to look at the exquisite markings on the ‘petals’.

Hellebores do not have petals in the normal sense of the word as their petals are really sepals (modified leaves that typically protect the flower bud).

Cultivation

To be honest once Hellebores have established they are very undemanding herbaceous perennials. They like areas of part-shade in our garden and seed themselves freely. When mature the plants do not like to be disturbed but careful transplanting of the seedlings (digging them up with soil so as to not expose the roots) allows you to distribute them throughout the garden.

You can also propagate larger plants by division in early spring if you have a particularly beautiful specimen that you want to bulk up. Your self-sown seedlings are unlikely to come true to colour (but half the fun is seeing how they will develop).

To show off the flowers at their best in the garden we usually remove the sad, dying leaves at soil level in January to expose the flowers. As well as exposing the flowers this helps reduce the spread of disease. The fresh new leaves will grow back again during the spring and look great throughout the summer.

Rich aubergine coloured Helleborus orientalis

Cutting and conditioning

With so few flowers around in the early months of the year, Hellebores are very valuable for winter arrangements. Because the flowers face downwards their full beauty may not be evident. For dinner table, coffee and side table arrangements simply taking the flowers and floating them in water face up in a clear crystal glass bowl can make a stunning display showing off all the varied colours and delicate markings.

table decoration of Hellebore flowers floating in water
Simple but effective table decoration of Hellebore flowers floating in water

It has to be said that many people find the conditioning of Hellebores a challenge. There seem to be a range of views on how this is best done.

Armitage and Lushman in “Speciality Cut Flowers” indicate that you can achieve 10-14 days in the vase. Stage of harvest seems to be particularly critical and they suggest for fresh flowers Hellebores should be cut when the stamens first become visible. For drying, flowers can be cut at anytime but particularly when the seed capsules become visible.

Sarah Raven in “The Cutting Garden” advocates putting the bottom inch of the stem in boiling water for 20 seconds and then plunging it into deep tepid water. With this treatment she indicates that the stems will stay fresh for 3 or 4 days (considerably less however than the vase life offered in Armitage and Lushman).

There also seems to be contradictory advice on the use of “flower food”. Comments from commercial growers in Armitage and Lushman indicate that “they have a wonderful long vase life, 10 days plus easy, and I give no special treatment other than Floralife”. In contrast Linda Beutler in “Garden to Vase” indicates that Hellesbore blooms do not tolerate floral preservative.

Most references indicate that Hellesbores do not last well in floral foam.

Our experience of using Hellesbores as cut flowers is that they are unpredictable. We have had most success when we have delayed cutting the flowers until the seed pods begin to develop. Cutting at this point the flowers are much more reliable and hold up well. Floret Farm’s “Cut Flower Garden” also recommends this approach and indicates that the flowers will last about 5-8 days in the vase.

It can be argued that using Hellesbores in ‘high stakes’ arrangements can be (is) risky. However, they are such charming flowers at a time of year when there is very little and it is well worth practising to perfect your conditioning technique.

Hellebores and tulips
Bouquet of purple Helleborus orientalis with tulips, cherry blossom and flowering currant. Helleborus foetidus provides a splash of fresh green at the bottom right of this picture .

Drying

As well as offering fresh cut stems, Hellebore flowers also dry well and can be used in buttonholes, corsages or wreaths. Gently covered with silica gel they will dry within 2 weeks and can then be stored in an air tight plastic box. They keep their colour well if kept in the dark and can be kept right through to the following Christmas to bring a different touch to Christmas wreaths.

Don’t be tempted to over dry them by leaving them in the silica gel for too long. They will simply suck up moisture when the are removed and will spoil quickly.

Christmas arrangement using dried Hellebore flowers, Helichrysum and Limonium

Other species in the garden

The majority of the Hellebores in the Waverley garden are Helleborus orientalis but we do also have occasional plants of the stinking Hellebore Helleborus foetidus. H. foetidus has smaller hanging bell shaped flowers on a tall stem that make a very useful fresh green addition to winter arrangements.

Hardy perennial

Origin: Greece and Turkey (ref: Wikipedia)

Family: Ranunculaceae

Hardiness: H7 (RHS hardiness rating – Hardy in the severest European continental climates (< -20)

Height: 40-45 cm

Flowering period: January to March

Derivation of scientific name:  According to Wikipedia and Witchipedia, the genus name Helleborus comes from the ancient Greek word elein, meaning “to injure” and bora, meaning “food”.

Toxicity:  Poisonous

Floriography:  Slander and scandal

References:

“The Cutting Garden” by Sarah Raven (ISBN 978-0-7112-3465-9)

“Specialty cut flowers” by Armitage and Lushman (ISBN 0-88192-579-9)

“Garden to Vase” by Linda Beutler (ISBN 978-0-88192-825-9)

“Cut Flower Garden” by Erin Benzakein and Julie Chai (ISBN 978-1-4521-4576-1)

How to ensure you get the longest possible vase life from your cut flowers – cutting and conditioning

There remains an entrenched belief amongst the flower buying public that British garden flowers do not last as long in the vase as those purchased from the florist or supermarket.

Inevitably this will vary from species to species but fundamentally those picked and harvested locally should have an immediate advantage.  The vast majority of shop bought flowers will have been grown in Columbia, Ecuador and Kenya, will have flown thousands of miles across the world to the flower auctions in Holland, been transferred overnight to UK flower wholesalers and subsequently purchased by retail florists ready for sale to the public.

There is a certain, and I agree rather idyllic perception, of walking around your flower garden on a sunny day in a large floppy hat and trug, cutting big open flowers and taking them back to the house and placing them straight into a vase of water to grace the rooms of your house.  Unfortunately, as Linda Beutler in her book Garden to Vase quite rightly points out, the reality is that assembling good bouquets and arrangements with a long vase life takes time, planning and patience.

How you handle, prepare and condition your cut flowers is critical.  If neglected or rushed this will indeed lead to disappointment.

The basics

It is important to remember that plants and their flowers are living things that require water, food and good health to prosper.  When you cut the flower you are immediately severing it from the supply of water that will keep the cells turgid, from the food that is normally generated by photosynthesis in the leaves and you will have created a significant wound that will be prone to infection by bacteria and other micro organisms.

Inevitably cutting the plant in this way will be a significant shock and you need to ensure that air and bacteria do not start to block the all important xylem and phloem vessels that will continue to carry the water and food along the stems of the cut flower.

Cleanliness

If bacteria, debris or fungal growth start to block the vessels in the stem it will significantly reduce the longevity of the flower.  It is important that all buckets and secateurs that you use are cleaned prior to cutting your flowers.

Time of day

The best time of day to cut your flowers if first thing in the morning before the sun begins to heat the air.  Overnight the stomata on the leaves will have closed, reducing the transpiration of water, and allowing the cells of the plants and flowers to become fully turgid.  Once the sun comes up photosynthesis begins and the stomata open allowing the flow of carbon dioxide into the plant and the resulting oxygen to escape.  At the same time transpiration of water occurs through these stomata and in hot weather the plant may not be able to draw up sufficient water to replace that being lost.

If you cannot pick in the morning then it is possible to cut during the evening as the air cools and the plants are well saturated with the sugars produced during the day.

Tools

The tools you use to cut your flowers should be clean and sharp.  Remember that you want to keep the vessels open so try to use cutters that will not mash or block the tiny vessels.  Use cutters with by-pass blades rather than anvil secateurs.

Cutting your flowers at the right stage

If you cut your biggest, brightest flowers when they are too mature they will not last long in the vase.  If the bees have got to your flowers and have already pollinated the blooms they will already be moving onto their next stage, dropping their petals and putting their energy into seed production.

For example, all the daisy type flowers, such as Cosmos, Rudbeckia and Ox-eye daisies, will not last long if the pollen has matured and the flowers have been visited by pollinating insects.  The way to tell is by touching the centre of the flower with the tip of your finger.  No pollen should come off and colour your finger.

Many flowers like roses, tulips and daffodils, will need to be cut before they open when the buds are first showing some colour.  Poppies are best picked when the bud is just about to burst open.

DSCF3821
Buckets of conditioned country garden flowers ready for delivery for a DIY wedding reception

Cut into water

We always cut our flowers straight into cool clean water in the field, cutting the stem at an angle to create a greater surface area for the flower to take up water (so that the cut end is not flat against the bottom of the bucket).  We strip off any leaves that will sit below the water surface.  The latter is important as any leaves below the water will quickly begin to decompose and create the infections that we want to avoid.

If the flowers or foliage are cut and then left awhile in the air, air bubbles will begin to be pulled into the vessels and inhibit the free flow of water up the stem and into the flower causing the flower to wilt.

Some flowers that produce a sticky sap (eg. Poppies and Euphorbia) will benefit from searing when they are cut.  Searing the end of the cut stem in boiling water or with a flame will stop these substances contaminating and poisoning the water and will help water uptake.

On woody shrubs and stems the important vessels for water uptake are in the cambium, the living layer of cells between the bark and the dead heart wood.  After cutting the stems at an angle, split the stems vertically up the centre to give as much surface area as possible for the uptake of water.  It may be beneficial to shave back some of the bark to reveal and expose the bright green cambium.

Up early cutting flowers in the morning light
Up early cutting flowers in the morning light before breakfast

Mixing flowers of different types

It is worth being aware that some flowers effect the longevity of other flowers and you should be careful of cutting them into the same field bucket.  An example of this is with daffodils and narcissus and these should be cut into a separate bucket.  The water should be changed every 20 minutes or so to check to see if the stems are still dripping sap from the cut wound.  Keep doing this until the sap stops running and then they can be left to condition.  Once the sap has stopped narcissus can be incorporated into arrangements with other flowers but do not be tempted to cut the stems again or the sap will start to run again.

It is also appropriate to do this with other plants with toxic sap like Euphorbia and Campanula.

Conditioning

This is such an important part of preparing and nurturing the flowers which you will have been lovingly looking after and growing for many months.  It is not to be rushed.

Your flowers should be placed in cool, deep water for at least 2 hours (preferably overnight) before you start to use them in bouquets or arrangements.  Keep them in  a cool room out of direct sunlight whilst they are conditioning.

With woody foliage you will need to condition for at least 24 hours and more if you can.  The tips of the shoots may initially droop but you will find that they eventually perk up if left long enough.  The key message is be patient and you will be rewarded.

There are varying opinions on whether the addition of “flower food” to the conditioning water is valuable or not.  Commercially available “flower food” contains sugars to feed the flowers (now that they have no leaves), help them take up water efficiently and keep the water free of bacterial infection.  This is such a small cost that for us it is simply part of maintaining the good health and cleanliness of the flowers that we have invested so much time in growing over the summer.

James C. Schmidt from the University of Illinois makes a valuable point about the impact of hard and soft water on the longevity of cut flowers.  He indicates that hard waters and those “softened” with a home water softener are unsatisfactory for keeping flowers fresh.  Clearly if you are growing flowers in a hard water area there is little you can do about this but the use of “flower foods” may be particularly valuable in hard water areas (because they lower the pH of the water).

Beware ripening fruit

It is worth remembering that ethylene is naturally produced by all ripening fruit.  Exposing flowers to ethylene will speed up the development of your cut flowers and eventual death.  Don’t be tempted to leave your flowers conditioning in an out house or kitchen where you are storing fruit or other ripening vegetables.

Any finally ….

When your flowers and foliage are fully conditioned you can now let your creative juices flow.  Cut the stems once again as you arrange them to help further water uptake and increase the flower life.

If arranging in a vase try to replace the water regularly to keep your flowers in tip top condition for as long as possible.

When delivering our Honey Pot Flowers bouquets by hand or by courier we always include detailed care instructions and flower food to help the recipient achieve the best from their flowers.  We often get feedback and comments from delighted customers telling us how pleased they are with their long lasting bouquets.

Further reading

It is important to recognise that although there are general principles to observe, ‘one size does not fit all’ when it comes to cutting and conditioning cottage garden flowers.  There is a wealth of additional hints and tips available in the following books where specific flowers benefit from a slightly different or a specific approach.

“Speciality Cut Flowers” by Allan M. Armitage and Judy M. Laushman (ISBN 0-88192-579-9)

“Garden to Vase” by Linda Beutler (ISBN 978-0-88192-825-9)

“Cut Flower Garden” by Erin Benzakein and Julie Chai (ISBN 978-1-4521-4576-1)

“Grow your own wedding flowers” by Georgie Newbury (ISBN 978-0-85784-253-4)

“The Cutting Garden” by Sarah Raven (ISBN 978-0-7112-3465-9)


Sweet Peas (Lathyrus odoratus)

For us, January is the time to start sowing Sweet Peas.  They are quintessential cottage garden plants with their delicate frilly petals and delicious scent.  In our view a Sweet Pea is not worth growing if it does not have a good scent.

As a flower Sweet Peas evoke such memories for both us and our customers.  They remind me so much of visiting my Nan on the Kent coast where the blooms would be picked fresh from the garden, simply arranged in a vase and the scent allowed to permeate throughout the rooms of the house.  Equally we have found that our customers have also loved them over the years.  When we used to run a Country Market stall simple bunches of Sweet Peas would always be the first to go.

Sowing and growing sweet peas

There seems to be a lot of mystique around sowing sweet peas but we have always found them very easy to grow and needing no specialist equipment or seed treatment.  Although in the past we have soaked the seed overnight before sowing we have not found this necessary to get good germination.  Roger Parsons ( www.rpsweetpeas.com ) indicates that soaking or chipping the seed may in fact reduce germination.

We certainly have good success with the following approach:

  • Sow 3 or 4 seeds in January in standard 9cm pots of a mix of multi-purpose compost and perlite.
  • Water well and place on the kitchen window sill (this is usually around a constant 18°C-20°C).  Do not water again until the seedlings start to emerge.
  • You will typically see the first seedlings show themselves in about 7-14 days.
  • Once the seedlings have emerged we move them out into a cold, unheated greenhouse.  They are best grown on hard in plenty of light so that they do not get leggy.  If the temperature drops to below -5°C they may need some protection.
  • We keep the seedlings up high on the greenhouse staging so that there is less risk of mice and other rodents getting to them.
  • Once the plants have reached four leaves, pinch out the tops of all the plants so that they bush out.
  • In around mid-March, we harden off for a couple of weeks before planting out into the garden.  We have grown them up canes in the past but this requires a lot of attention to ensure the plants are tied in effectively.  More recently we have found that standard pea and bean netting works particularly well as long as you buy a decent quality that can be used again and again over a number of years.
  • You should create a deep well dug planting trench incorporating lots of well-rotted organic matter into the soil both to hold the moisture and feed the hungry plants through the season.
  • Plant out the whole pot of 3 or 4 plants together without disturbing the roots and water in well.  Each pot should be planted around 12 inches apart and the tendrils gently encouraged to take a grip of the netting.
  • The final stage for us (if we don’t want to have wasted all our hard work) it to run chicken wire around the base of the row to keep the rabbits at bay.

All you need to do now is stand back and watch them grow making sure that you keep them regularly watered and fed with a liquid feed every couple of weeks once they are flowering.   As soon as they start to flower pick them regularly (probably every day).  The more you pick the more flowers you will get.

It is possible to succession sow into March/April if you want to extend the flowering season.

Sweet Peas ready to pick
Sweet Peas growing vigorously and ready for picking in the Honey Pot Flowers garden

Varieties to grow

There are so many varieties to choose from that it is often difficult to know where to start if you have not grown them before.  Actually half the fun is experimenting with new varieties each year to see what you like.  For us, although colour and a long stem length are important, a sweet pea is not worth growing if it does not have a decent scent.

Roger Parsons offers a wide range and groups them into the following types:

Spencer & Summer Multiflora varieties  – the best types for exhibition and for cutting for the house.

Old Fashioned, Grandiflora & Semi-grandiflora varieties  – the best types for scent and garden decoration.

Early-flowering varieties –  for Winter and Spring flowers, including Early Multiflora type for cut flower production

Dwarf and Semi-dwarf varieties – for garden decoration when shorter plants are required

Very helpfully an indication of scent strength is also offered against each variety.

Varieties that we grew in 2017

  • Albutt blue (Pale whitish blue – Semi Grandiflora)
  • Cathy (Creamy white – Semi Grandiflora)
  • CCC (White  – Modern Grandiflora)
  • Jilly (Creamy white – Spencer)
  • John Gray (Pale pink  – Spencer)
  • Judith Wilkinson (Bold bright pink – Spencer)
  • Yvette Ann (Salmon pink – Spencer)
  • Just Julia (Mid blue – Spencer)
  • Naomi Nazareth (Pale blue – Spencer)
  • Matuccana (Dark red and blue – Modern Grandiflora)
  • Adorabel (Lavender/mauve – Modern Grandiflora)
  • Solitude (Lavender – Spencer)
  • Almost Black (Dark maroon – Modern Grandiflora)

Rather than buy costly new seed every year we allowed some plants to go to seed.  This was collected and stored in paper envelopes over the winter and we will be sowing these in the next few days.

Pale blue sweet peas with lime green Alchemilla

Cutting, conditioning and arranging with Sweet Peas

It is fair to say that the vase life of sweet peas is rather shorter than many cottage garden flowers.  Having said that you will have so many to cut that you can easily provide the house with a constant supply of fresh, fragrant blooms for day after day throughout the summer.

For the longest vase life pick early in the morning when only the first bud on the flower is open.  Be careful not to bruise the delicate blooms.  Condition well for at least 2 hours and overnight if possible in deep clear water.  Refresh your vase water every 24 hours.    Some growers treat the flowers with Silver Nitrate to extend vase life but we have not tried this technique.

For us, it is the very fleeting nature of Sweet Peas that gives them their charm.  In arrangements exploit this simple charm creating uncluttered arrangements with delicate fillers like the lime green flowers of Alchemilla mollis (Lady’s mantle).

Most of all position your arrangements in the house so that you can to breathe in and enjoy that wonderful fragrance.

Further details

Hardy climbing annual

Origin:  Sicily, Cyprus, southern Italy and the Aegean Islands (ref: Wikipedia)

Latin name:  Lathyrus odoratus

Family: Papilionaceae (ref: RHS) – legumes, peas and beans family

Height:  6-8 feet

Flowering period:  Late spring to summer

Cut flowers:  Yes but have limited vase life.


2018 progress update

4 Jan 2018 – seeds sown

18 Jan 2018 – seeds germinated

23 Jan 2018 – seedlings moved to cold greenhouse to grow on in cool, light conditions

14 March 2018 – tips pinched out and staked

New Sweet Pea plants with the tips taken out and staked to stop tangling and possible damage (14 March 2018)